

If you have ever seen a capybara, you know why so many people want to draw them. These gentle, friendly animals have a simple yet charming shape. Drawing a capybara may look hard at first, but with the right steps, even beginners can create a cute, realistic picture.
In this guide, you will learn how to draw a capybara easy step by step. You don’t need special talent or expensive tools—just some patience and a bit of practice.
What You Need Before Starting
Before you start, gather your drawing supplies. You do not need fancy materials. Here’s what works best for beginners:
- A sharp pencil (HB or 2B)
- An eraser
- Plain paper (A4 size or sketchbook)
- Colored pencils or markers (optional)
If you want to go digital, a drawing tablet or app is also fine. The steps are the same for both paper and digital art. Make sure your workspace is well-lit and comfortable.
Understanding Capybara Shapes
Capybaras look unique, but their body is made of simple shapes. Learning to see these shapes makes drawing much easier. The main parts are:
- Body: An oval shape, long and rounded
- Head: A smaller oval connected to the body
- Legs: Four short, thick legs, like rounded rectangles
- Nose: A soft curve at the front of the head
- Ears: Two small, rounded triangles
- Eyes: Small circles on the sides of the head
Let’s look at a basic comparison of capybara body parts and similar animals:
| Animal | Body Shape | Leg Length | Ear Shape |
|---|---|---|---|
| Capybara | Long oval | Short | Rounded triangle |
| Guinea Pig | Short oval | Tiny | Small round |
| Beaver | Wide oval | Medium | Pointed |
This helps you see that drawing a capybara is not so complex. Focus on the big shapes first.
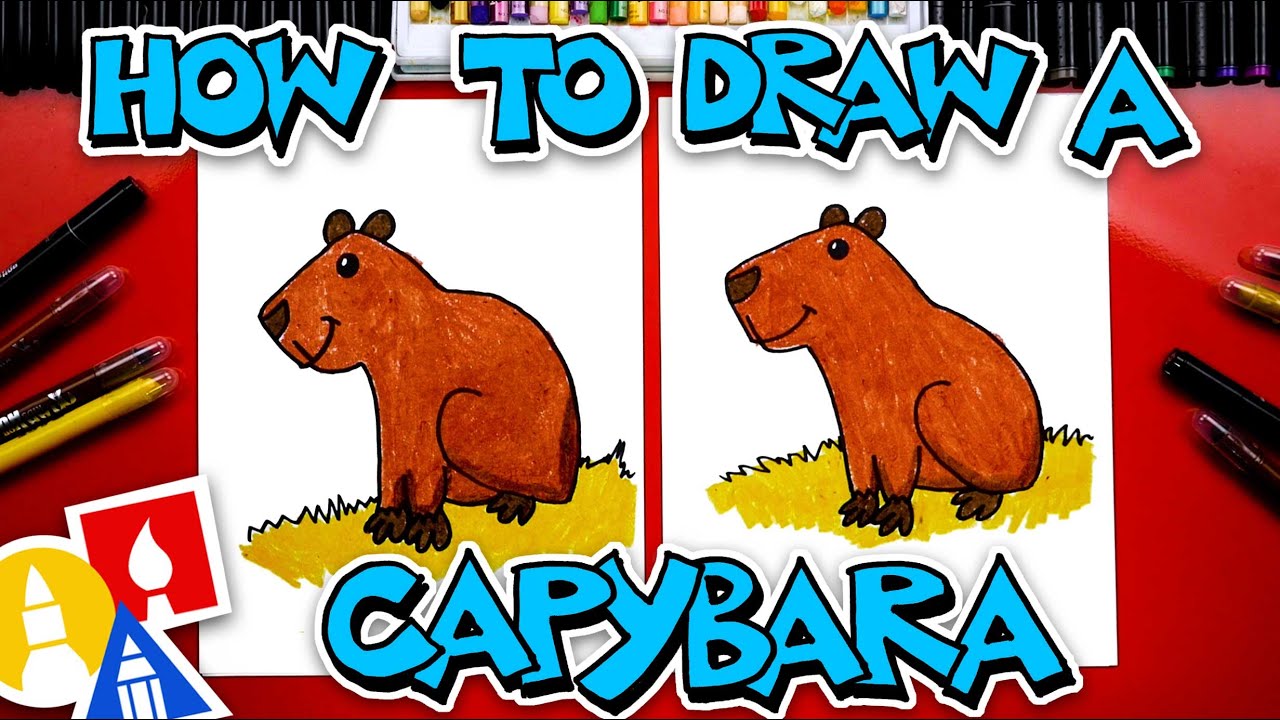
Credit: www.youtube.com
Step-by-step Guide: Drawing A Capybara
Now let’s start drawing. Follow these steps for best results.
1. Draw The Main Body Shape
Begin by sketching a large, horizontal oval in the center of your paper. This will be the main body. Don’t press too hard; keep your lines light so you can erase them later.
2. Add The Head
Draw a smaller oval to the left end (or right, depending on your capybara’s direction). Overlap it slightly with the body. The head is flatter at the top than the body, so gently flatten the top edge.
3. Connect Head And Body
Use a curved line to join the head and body at the top and bottom. Capybaras have thick necks, so keep this connection wide and smooth.
4. Sketch The Legs
Draw four legs using short rectangles or thick cylinders. The front legs are closer together, while the back legs are spaced further apart. Make sure the legs are not too long—capybaras have low bodies.
5. Add Ears And Nose
On top of the head, draw two small, rounded triangles for the ears. For the nose, curve the front of the head downwards, making a gentle slope rather than a sharp point.
6. Place The Eyes
Mark small circles for the eyes on each side of the head, about halfway between the nose and the top of the head. Capybara eyes are not too large or close together.
7. Draw The Mouth And Toes
For the mouth, draw a tiny curved line at the bottom of the nose. Add three short lines at the end of each leg for the toes.
8. Refine The Outline
Now, go over your main lines with a darker pencil or pen. Smooth out any rough parts. Erase the extra sketch lines. Your capybara should now look clear and simple.
9. Add Fur Details (optional)
Capybaras have short, rough fur. Add some light, short lines along the body to suggest this texture, but do not overdo it. A few quick strokes are enough.
10. Color Your Drawing (optional)
Use brown and beige pencils or markers to color your capybara. The nose and toes can be a little darker. Leave a small white spot in the eye for a shiny look.
Here is a quick reference for the main drawing steps:
| Step | Action | Tip |
|---|---|---|
| 1 | Draw body oval | Keep lines light |
| 2 | Add head oval | Flatten top slightly |
| 3 | Connect with curves | Make neck thick |
| 4 | Sketch legs | Short and wide |
| 5 | Add ears and nose | Small, rounded triangles |
| 6 | Place eyes | Not too big |
| 7 | Draw mouth and toes | Simple lines |
| 8 | Refine outline | Erase extra lines |
| 9 | Add fur details | Short strokes |
| 10 | Color drawing | Use natural browns |
Two Common Mistakes Beginners Make
Many new artists make small errors when drawing a capybara:
- Legs too long: Capybaras are close to the ground. If the legs are too tall, the drawing will look more like a dog.
- Head too round: The capybara’s head is longer and flatter than a guinea pig’s.
Always check your sketch to avoid these common problems.

Credit: helloartsy.com
Practical Tips For Success
- Practice drawing simple ovals before starting. This helps keep your shapes even.
- Use reference photos. Real capybara pictures show body proportions and fur direction.
- If you want to make your capybara look happy, curve the mouth upwards a little.
- Try drawing capybaras in different poses once you master the basic steps.
If you want to learn more about capybara anatomy for artists, check Wikipedia for detailed images and facts.
Frequently Asked Questions
How Long Does It Take To Draw A Capybara?
For most beginners, a simple capybara drawing takes about 20–30 minutes. If you add color or details, it may take up to an hour. With practice, you will finish faster.
Can I Draw A Capybara Without Any Drawing Skills?
Yes, you can. This step-by-step method uses basic shapes, which are easy for anyone to learn. Even if you have never drawn before, you can follow along and create a good result.
What Is The Best Way To Color My Capybara Drawing?
Use light brown as the main color, with some darker brown for shading. Colored pencils work well because you can layer colors for a natural look. You can also try watercolors or markers if you prefer.
Should I Draw The Background?
A simple grass or water background makes your drawing more interesting, but it is not required. If you are a beginner, you can leave the background plain. Add it only when you feel comfortable.
How Do I Make My Capybara Look More Realistic?
Focus on the proportions: keep the body long and the legs short. Add a few fur lines for texture, and use reference photos to check your drawing. Light shading under the belly adds depth.
Drawing a capybara can be fun and relaxing, even for beginners. By breaking the process into easy steps, you can quickly improve your skills and enjoy the results. Remember, practice is the key—each drawing will look better than the last.
Pick up your pencil and try drawing your own capybara today!
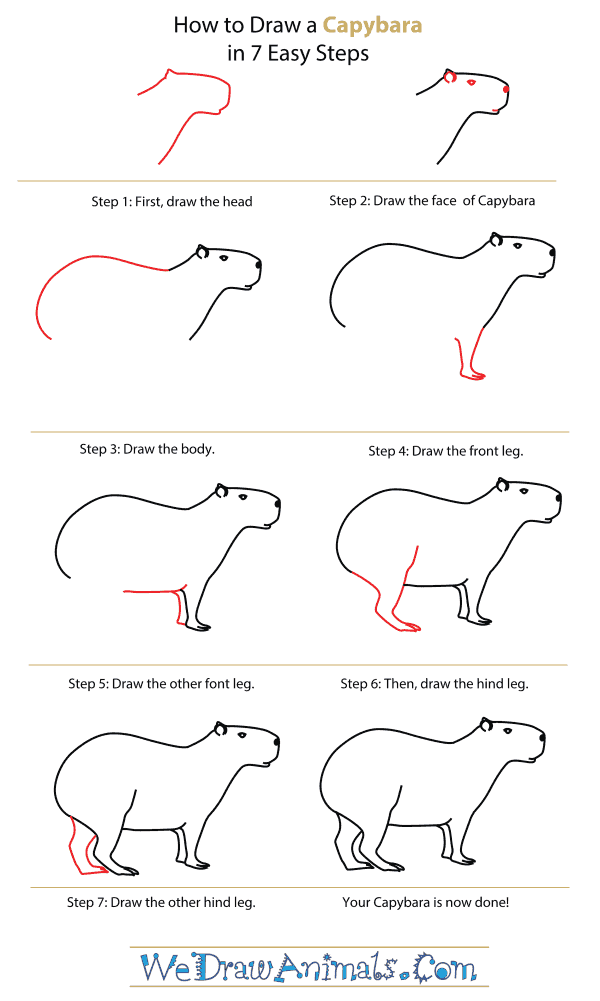
Credit: www.wedrawanimals.com


