

Have you ever wanted to draw a capybara but didn’t know where to start? You’re in the right place.
This guide will make it simple and fun for you to create your own adorable capybara drawing. Whether you’re a beginner or just looking to improve your skills, you’ll find easy steps that anyone can follow. By the end, you’ll have a charming capybara picture you’ll be proud to show off.
Ready to bring this gentle creature to life on paper? Let’s get started!
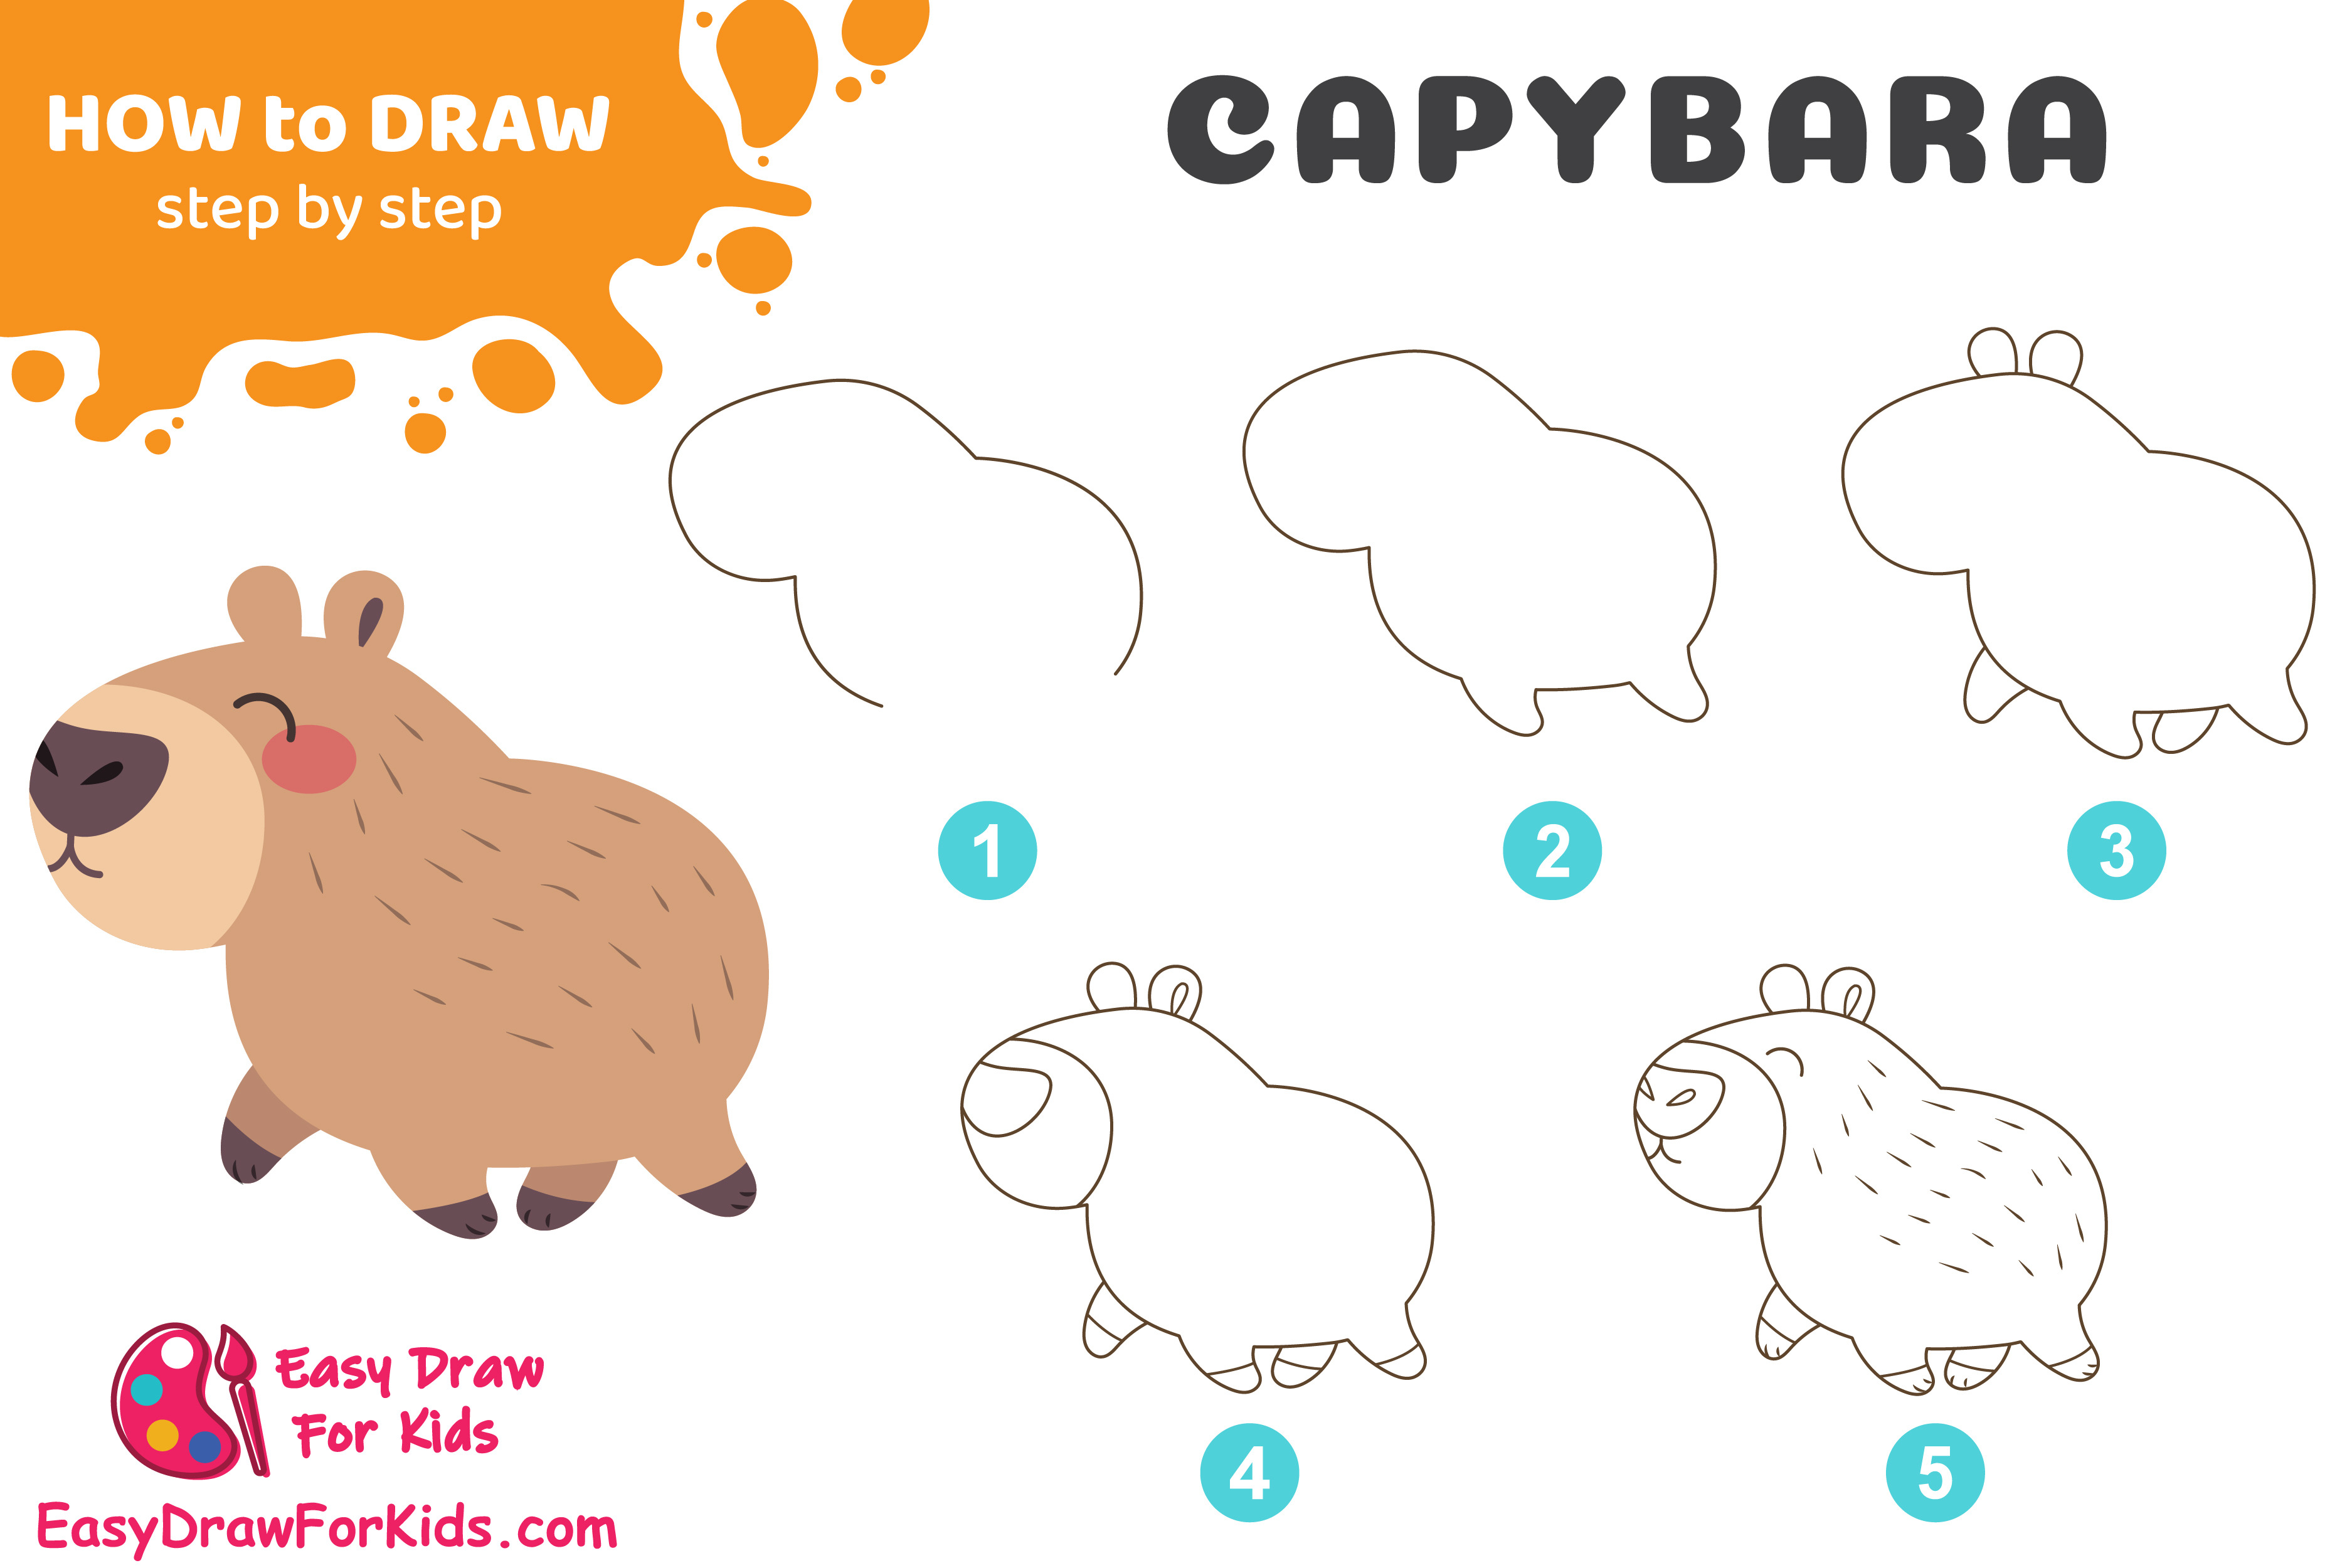
Credit: tips.clip-studio.com
Materials Needed
Gathering the right materials helps make drawing a capybara easier and more fun. Simple tools allow you to focus on shapes and details without distractions. You do not need many supplies to start sketching your capybara.
Basic Drawing Tools
Start with a pencil for easy sketching and erasing. A pencil with a soft tip like 2B works best. Use a clean eraser to correct mistakes without smudging. Choose plain white paper or a sketchbook with smooth texture. A sharpener keeps your pencil tip fine for detailed lines.
Optional Coloring Supplies
Coloring adds life to your capybara drawing. Colored pencils offer control and blend colors well. Watercolors create soft, natural shades if you prefer a gentle look. Markers give bright, bold colors for a cartoon style. Use a thin black pen to outline your drawing for clearer shapes.
Sketching The Basic Shape
Sketching the basic shape of a capybara lays the foundation for your drawing. It helps you get the right size and pose. Start simple with light lines. This step makes the detailed work easier later. Focus on capturing the overall form first. Use easy shapes to build the structure.
Drawing The Body Outline
Begin with a large oval for the body. The capybara has a wide, rounded shape. Draw the oval horizontally across your page. Keep the lines soft and light. This shape shows the main part of the capybara’s body. Make it slightly flattened on the bottom to look natural.
Add small curves for the hips and shoulders. These curves give the body more shape. Avoid sharp angles. The capybara’s body is smooth and soft. Keep the outline simple at this stage.
Adding The Head Shape
Draw a smaller oval for the head, placed near the front of the body. The head is round with a gentle slope at the nose. Connect the head to the body with two short lines for the neck. The neck is thick but short.
Position the head slightly tilted to show a natural pose. Keep the head shape simple. This makes adding details easier later. Use soft, light lines to sketch the head.
Defining Facial Features
The face of a capybara has simple but unique features. Capturing these features makes your drawing look real. Focus on the eyes, nose, mouth, and ears. These parts give the capybara its friendly look. Start by placing the eyes and nose correctly on the face. Then, draw the mouth and ears with care. Each step builds the capybara’s expression.
Eyes And Nose Placement
Place the eyes wide apart on the head. Capybara eyes are round and dark. Draw small circles for the eyes. Keep them low on the face, near the middle line. The nose sits just below the eyes. It is wide and flat. Draw a small oval shape for the nose. Add two tiny nostrils inside the oval. This placement keeps the face balanced and natural.
Drawing The Mouth And Ears
The mouth is simple but important. Draw a short horizontal line under the nose. Add a small curve at each end. This shows the gentle smile of the capybara. The ears are small and rounded. They sit high on the head, above the eyes. Draw two small half-circles for the ears. Add light lines inside to show the ear folds. These details bring your capybara to life.
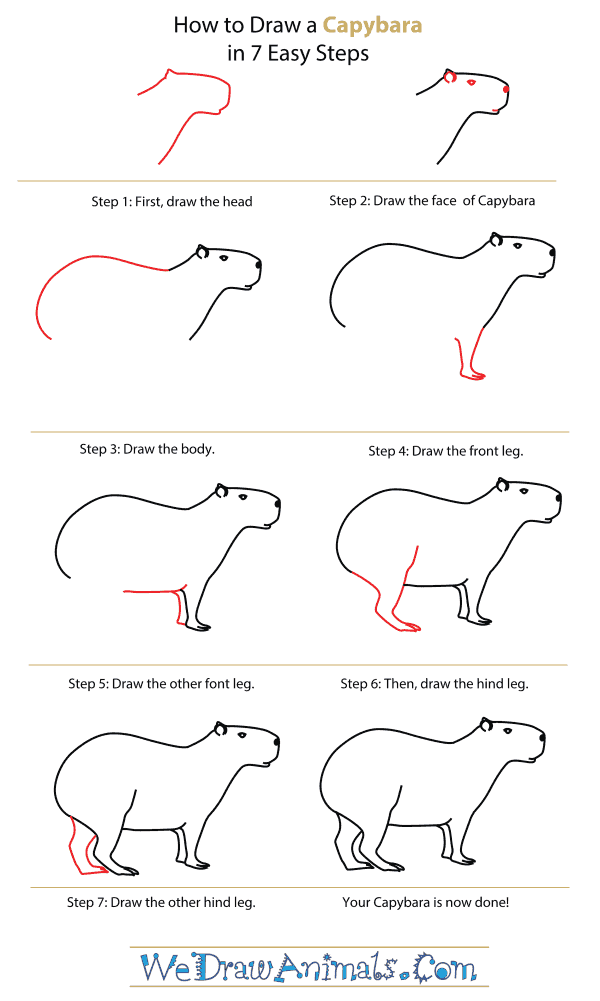
Credit: www.wedrawanimals.com
Adding Details And Texture
Adding details and texture brings your capybara drawing to life. It gives the sketch a natural look. Focus on the fur and shadows. These small touches create depth and realism.
Take your time with this step. It makes a simple outline into a vivid animal. Let’s explore how to add fur patterns and shading.
Fur Patterns And Lines
Start by drawing short, soft lines for the fur. Follow the body’s shape. Use quick, light strokes. This shows the direction of the fur.
Capybaras have thick, coarse fur. Make some lines close together. Leave others spaced out. This adds texture and variety.
Draw longer lines on the back and shorter ones near the face. Add small patches of fur around the ears and neck. This detail helps the fur look natural.
Shading For Depth
Use shading to show light and shadow on the capybara. Darken areas where the body curves away from light. Leave lighter spots where light hits directly.
Shade softly around the eyes and under the chin. These shadows give the face shape. Blend the shading gently. Avoid harsh lines for a smooth look.
Adding shadows under the legs and belly makes the capybara look grounded. Shading adds a 3D effect to the drawing. It makes your capybara appear real and alive.
Refining And Finalizing
Refining and finalizing your capybara drawing is an important step. This stage brings your sketch to life and makes it clean and clear. It helps your artwork look neat and ready to show.
Take your time to improve details and remove extra lines. Small touches can make a big difference. Your capybara will look more realistic and pleasing.
Cleaning Up Sketch Lines
Start by erasing unwanted sketch lines carefully. Use a soft eraser to avoid damaging the paper. Keep the main outlines sharp and visible.
Focus on smoothing rough edges and fixing uneven parts. This step helps the drawing look tidy and professional. Check the shape of the capybara’s body and face. Correct any mistakes gently.
Enhancing With Color
Choose soft, natural colors for your capybara. Use light browns, tans, and greys to match its fur. Apply colors slowly and evenly with pencils or markers.
Add shading to show fur texture and body shape. Shade under the belly, around the eyes, and near the legs. This makes your drawing look three-dimensional.
Blend colors smoothly to avoid harsh lines. Use a blending tool or a light touch with your pencil. Your final capybara will look warm and lifelike.

Credit: www.youtube.com
Tips For Cute Capybara Art
Creating cute capybara art needs more than just basic shapes. Small details bring your drawing to life. Focus on simple tips to make your capybara look friendly and charming. This section shares ideas to help your art feel warm and inviting.
Follow these tips to capture the gentle nature of capybaras. Use soft lines and round shapes. Keep the features simple but expressive. Your drawing will become more appealing and fun to look at.
Capturing Expression
Start with the eyes. Big, round eyes show kindness and curiosity. Draw them slightly tilted for a gentle look. Add small highlights to make eyes sparkle. Keep the mouth simple, a slight curve works well. This creates a soft smile. Avoid sharp lines to keep the mood calm and friendly.
Playful Poses
Capybaras are often relaxed or playful. Show this by drawing them lying down or splashing water. Use smooth curves for the body to keep it soft. Try different angles like sitting or stretching. These poses add life and fun to your art. Keep the limbs short and rounded to keep the cute effect.
How Capybara World Can Help You with How to Draw a Capybara
Learning Through Drawing: Bringing Your Capybara to Life
As you practice sketching the basic shape and defining those adorable facial features, remember that each line helps you understand the capybara’s unique form and gentle personality. Adding details and texture isn’t just about making your drawing look good—it’s a fun way to observe the little quirks that make these animals so charming. This hands-on approach deepens your appreciation for capybaras beyond just art.
Drawing is a practical learning tool that connects you with nature in a playful, relaxed way—something we’re all about at Capybara World. If you ever want to dive deeper into capybara behavior or anatomy to improve your sketches, our team, including wildlife biologist Marina Velasco, is always exploring new insights that can inspire your art. Feel free to reach out at hello@capybara-world.com for tips or questions as you refine and finalize your masterpiece.
Frequently Asked Questions
What Materials Do I Need To Draw A Capybara?
You need paper, pencils, an eraser, and optional colored pencils. These basic tools help create clear and detailed sketches effectively.
How Do I Start Sketching A Capybara’s Shape?
Begin with simple shapes like ovals for the body and head. This method helps capture the capybara’s round and bulky form easily.
What Details Make A Capybara Drawing Realistic?
Focus on the eyes, nose, fur texture, and paws. Adding subtle shading and fine lines enhances the lifelike appearance of your drawing.
Can Beginners Draw A Capybara Step-by-step?
Yes, breaking the drawing into simple steps makes it easy. Follow basic shapes, refine outlines, then add details gradually for best results.
Conclusion
Drawing a capybara can be fun and simple. Start with basic shapes and add details step by step. Practice helps improve your skills every time. Don’t worry about mistakes; they are part of learning. Try different poses and expressions to make your drawing lively.
Enjoy the process and keep your pencil moving. Soon, you will create capybaras that look great and show your style. Drawing brings joy and relaxes the mind. So, pick up your pencil and start drawing today!


